I have always been interested in genealogy, and thought this would be a creative way to go about it! I was even more inspired after seeing a few episodes of "Who Do You Think You Are?". Did y'all watch that show? I love that Brooke Shields descended from royalty! The sponsor of the show was ancestry.com, which is such an amazing site. You can enter your family information, and things will pop up that may be links to your tree. You can view the actual census documents from the 1800s! And manifestos from ships full of people immigrating to America.
1850 Census Report for Louisa May Alcott:

The Unsinkable Molly Brown from the Titanic's Passport Application:

Ok - so after I researched our tree, which took a while, and some digging, (If you are a Rathgeb, German by way of Switzerland - please email me!!) I was ready to make the tree. Martha provides the templates and makes things sound like they will be so easy, and the products so readily available! It is not so Martha!
Here is the list of tools and materials Martha calls for:
Problem #1 - Ace Art Supply has never heard of 30-by-40-inch watercolor paper. Hobby Lobby and Michael's don't have anything that size either. But I did find a smaller size watercolor paper at HL that I thought might work. I had it printed out on drafting paper at an office supply store to make sure it would work on the watercolor paper I found, and it would!
Problem #2 - No one can print on large paper unless it is on a roll. What!? After all that, and now no one can do it!? Minuteman Press to the rescue! They have beautiful watercolor paper on a roll! Brian at MP helped me out and I had my tree the next day! I highly recommend them.
Next up - the templates for the name tags. Now, if you work for Martha, or you ARE Martha, you probably have exemplary penmanship that you don't mind to display from now until the end of time under museum quality glass - but I do not. In Photoshop, I layered text over Martha's template and used a great handwriting font from Kevin and Amanda (if you haven't heard of them, they have amazing fonts! And lots of other neat creative stuff on their site). I used the font "Pea Nic Script" for my tree.
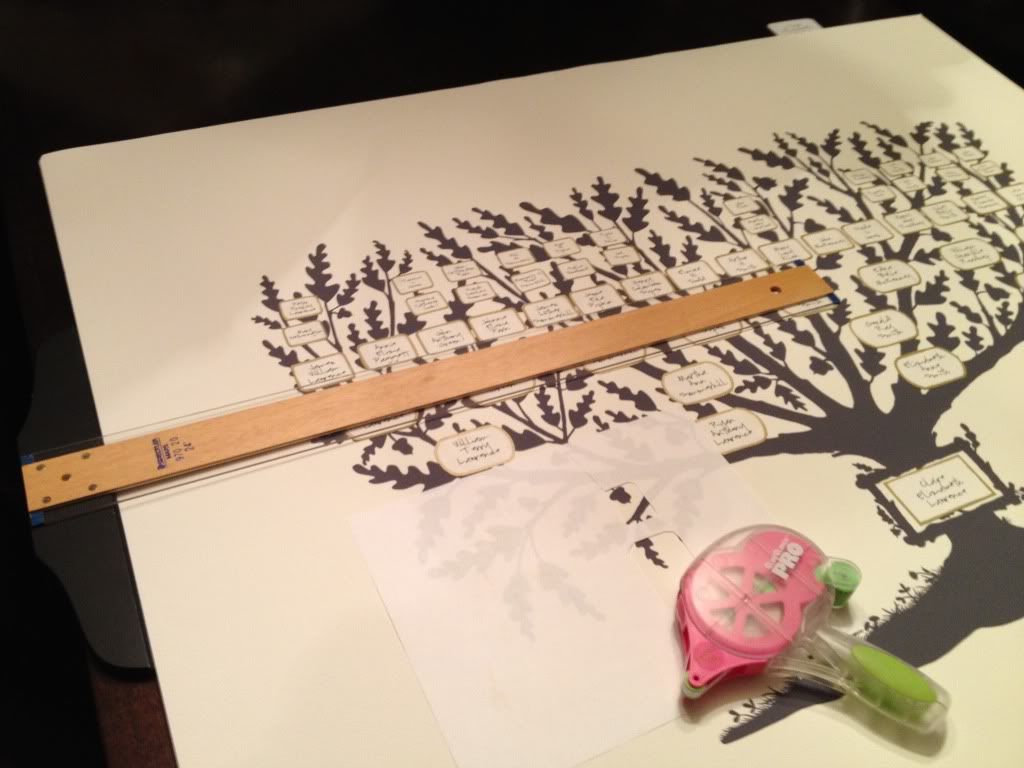
Then I used the sheet of watercolor paper I bought and could not use for the tree, cut it up into 8.5" x 11" pieces and printed out the template tags. I cut out the tags (with scissors instead of a craft knife) and traced around the edge with a gold paint pen (instead of a paint brush). I made the tag with Claire's name at the base of the tree a bit larger than the others. And I made the older generations a little smaller so I could fit more on the tree.
I think I had the tags laid out for 2 months before I had the time and the nerve to glue them down. I used my T-square to line things up and my scrapbook adhesive gun to glue them down.
Now how do I frame this beast!? I did consider that before I had it printed. I had in mind to fill a large blank wall in the powder room, so I wanted it to be sizable. Because of the proportions of the tree, I knew that I would have to custom frame. Any ready made frame would not have an even mat on all sides. My first trip to Michael's for framing resulted in about a $300-$350 framing job - what!?
My high-end selections:

That was not going to fly.... back to the drawing board...My next trip to Michael's, with a budget in hand and with the help of my friend Kathy's (who just happens to be a Michael's framer, an excellent framer at that!) artistic eye, I settled on these two choices:
And picked the top one!
After a long wait behind all of the Christmas presents being framed, I finally got the finished product! And here it is... almost too pretty to put in a bathroom.
Have you done any family tree projects or ancestral art?

Linking to:
The DIY Project Parade at The DIY Showoff
Savvy HomeMade Monday at Home Savvy A to Z
Weekend Warrior Link Party at Ask Anna Moseley
Metamorphosis Monday at Between Naps on the Porch
Made By You Monday at Skip to My Lou
Tuesdays at Shwin & Shwin
Tuesday Treasures at My Uncommon Slice of Suburbia


